


Now, we are learning Programming therefore I am writing the Javascript and It is a kind of the Framework which is Next js. There has two option which is App Router, Page Router with Typescript .
Right now, I will explain auth js with JWT which is a 3rd Party Library designed and auth using Next Js. It provider relevant feature to make the Process of implementing login easier, And you can read at detailed information, you can refer to to next- auth introduction.
What is installation, first, set your Next js project and then proceed with installing the next auth library
with ” npm I next- auth
How about Yarn
you can start with ” yarn add next-auth”
previous versions of Next.js, placing the […nextauth].js file under the pages/api/auth directory was sufficient for functionality.
However, with Next.js version 13, following the updated App Router structure, you should create a route.js file under the app/api/auth/[…nextauth] directory if you working with APIs like NextAuth.
If you’re using TypeScript, you can utilize the .ts extension.
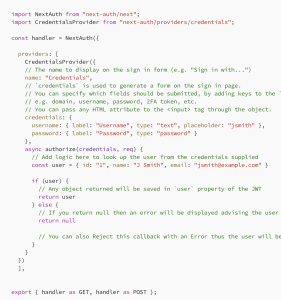
Upon closer inspection, you might notice a distinctive export syntax employed at the end. This syntax is part of the ES6 module export feature, introducing a fresh approach to designate the exported module’s name using the ‘as’ keyword. This approach serves a pivotal role in facilitating the execution of handler functions via either the GET or POST methods
This importance stems from Next.js 13’s strong recommendation to export modules using the GET and POST methods. By exporting the handler object as illustrated above, you unlock the capability to import it in a manner that aligns precisely with your intended use.
This empowers you to seamlessly tailor your import approach to either GET or POST, adhering harmoniously to Next.js 13’s directive to emphasize GET and POST methods for exports.
Within the “providers” section, you have the flexibility to incorporate various options. In the provided code, we’ve chosen to use the CredentialsProvider. This provider comprises several key components.
To start, there’s the “name” section, followed by the “credentials” section. This “credentials” part directly corresponds to the content within the login form.
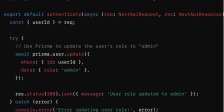
Lastly, we encounter an asynchronous function known as “authorize”. Within this function, a thorough validation of the email and password elements takes place. If the validation proves successful, the function returns a user object. Conversely, if the validation fails, it returns null.
NextAuth provides a built-in login form, and when you navigate to the “/api/auth/signin” URL, you’ll encounter a login form like below.